My latest project is an end grain cutting board made using Maple, Jatoba, and Texas Ebony. I've only made two cutting boards, my first being a simple maple block that I made in school about 10 years ago (proud to say that it is still in use!), so I wanted to build one with a little more pop this time. I purchased the wood about 10 months or so ago on a pretty tight budget, which is how I ended up with the combo used. The maple is reasonably priced in large quantities, however it also doesn't offer a lot of character when used on an end grain project (I'm not knocking maple.. i really love the stuff, I just wanted some color). Knowing I had to be selective on wood types I went down to the local wood store and asked for some help choosing a variety of hardwoods that would achieve my goal of a light wood, a medium brown, then a black wood. For the black color I wanted Ebony was my first pick, however very out of the question price-wise. That is until the employee showed me a load of Texas Ebony they just received. These pieces were already rough cut to the size I needed and darn near Ebony in color. I was sold. And a little poorer. The Texas Ebony was about half the price of real Ebony, but I'm cheap. The last wood choice was entirely the store's idea and the color was perfect. For a medium brown I ended up purchasing a good length of Jatoba, which was surprisingly very reasonable. The combination worked well together, now I just hope the glue holds and I don't end up with multiple cutting boards. Here is a finished picture, then we'll dive into the process...
So months after I purchased the wood I realized that I grossly underestimated the amount of wood to buy, as I had wanted to build a block a little larger that was about 3" thick with no need for legs. Anyways, to start the process I cut the wood into lengths that provided enough slats and began gluing them up a few at a time. This progressed slowly over a 2 or 3 week period gluing when I could, resulting in these photos (sorry for the blur, some were with the phone):
The end result of the gluing was a large slab of wood in a semi-random order. This chunk would then get planed before getting cut into slats.
To continue my trend of screw up honesty, I will admit that I often cut twice and measure once, or mis-measure, or I'm bad at math.. whatever. This resulted in two separate slabs needing to be glued up as shown below.
Next up, trimming and crosscutting these bad boys into their final shapes before further gluing.
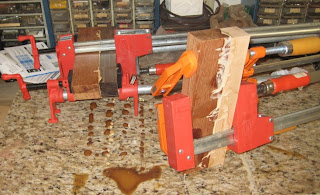
Next up, gluing the newly trimmed strips together. I just turned every other piece around so the joints won't match up and to give a little pattern to the what was supposed to be random piece. Let the glue-fest begin:
After that mess I planed it...
And began the feet. I had some Texas Ebony left over; sanded a beveled edge, cut, doweled, and glued onto the bottom of the board.
The top got a matching beveled edge with the router, a good sand job, a little oil, and is now ready for some chopping in the kitchen.
I like the look of the block's pattern even though it wasn't intentional and learned a lot on this project. First, get better at math. Wasting wood sucks and is expensive. Second, use pieces of wood between your clamps and the project. I cracked a few end joints in the final glue up because the pressure from the clamps wasn't evenly applied. I think I doctored them back to life, but only time will tell how long this block will last in the kitchen. My last one is still going strong, but this end grain style has so many joints we will see.
End.


