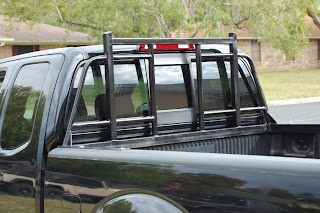
I'm switching it up a bit with this post... showing a recent metal project rather than wood. This was a headache rack for a Nissan Frontier that my brother and I built one Saturday for his truck. He had looked for one already made from different suppliers, but none seemed to offer a decent looking rack for mid-size pickups. The ones offered where either ugly, ridiculously expensive, or both. Usually both. Our solution? Build one from scratch that actually fits the truck - one that goes with the lines of the truck to make it unnoticeable, while still offering the cab protection from lumber or whatever else is being hauled.
The first step in building this rack was making the base that fit the bedrails. All the support for the load being hauled will come from this foundation, so it was vital to give it enough strength while not leaving big bulky brackets behind. We went with 1.5" angle iron, going back down the bedrails about 15" to give it additional support to prevent it from twisting.
After welding up the base we then made the vertical supports running up from the base. We made these to be just taller than the roof of the cab in order to still be useful while not sticking out and looking out of place.
The two main vertical supports shown, as well as the main lateral piece, were both made using square tubing. These were the largest pieces used on the rack, and chosen to ensure it had the strength it needed. Some of the remaining vertical and lateral pieces were made using smaller round tubing, but those provided more support to the square rack rather than carrying loads themselves. In the second picture above you can see me beginning to work some of that round tubing which would be used for the two center supports.
The two center supports were placed in line with the rear window lines to help keep the view clear from inside the cab. The outer two supports were made using smaller round tubing bent on a pipe bender.
We continued the same lines started with the outer supports through the entire rack...
Finally after adding the rest of the inner lateral supports the unit was all complete- the only thing remaining was cleaning it up and painting.
And the final shots of the rack installed with a fresh coat of black paint...
End.


